nikon fg instruction manual

nikon fg instruction manual
Nikon FG Instruction Manual⁚ A Comprehensive Guide
The Nikon FG is a compact and versatile 35mm SLR camera that was introduced in 1982. This guide provides comprehensive instructions for operating the FG. It covers everything from basic functions to advanced techniques. Learn about loading film‚ setting exposure‚ and using flash!
The Nikon FG‚ a 35mm SLR camera manufactured from 1982 to 1984‚ stands as a testament to Nikon’s commitment to accessible photography. Designed for both beginners and intermediate users‚ the FG boasts a compact and lightweight design without compromising functionality. It offers a range of exposure modes‚ including Programmed (P)‚ Aperture Priority (A)‚ and full Manual (M)‚ providing flexibility in various shooting situations.
Its user-friendly interface and comprehensive feature set make it an ideal choice for those seeking to explore the world of film photography. This instruction manual serves as a guide to unlock the full potential of your Nikon FG.
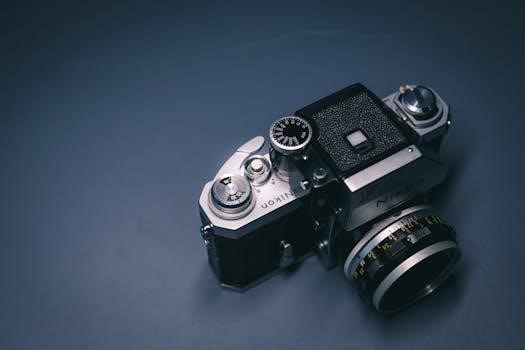
Overview of the Nikon FG Camera
The Nikon FG is a 35mm SLR that offers Programmed‚ Aperture Priority‚ and Manual exposure modes. Released in 1982‚ it features a compact design and comprehensive controls. It makes it a versatile tool for photographers.
Key Features and Specifications
The Nikon FG boasts a metal focal plane shutter with speeds ranging from 1/1000 to 1 second‚ plus Bulb mode. It offers programmed auto exposure‚ aperture priority‚ and full manual control. Its compact size made it a popular choice. The FG also includes a built-in light meter for accurate exposure settings.
It has an ISO range that accommodates various film speeds. The camera is powered by batteries‚ ensuring reliable operation of its electronic features. The FG’s viewfinder provides essential shooting information. This includes metering and focus aids.
The camera also supports Nikon Speedlights for enhanced flash photography capabilities.

Understanding the Camera’s Controls
Familiarizing yourself with the Nikon FG’s controls is essential for effective use. This section details the function of each button‚ dial‚ and lever. It will help you master camera operation.
Top Panel Controls⁚ Shutter Speed Dial and Mode Selector
The top panel of the Nikon FG houses the shutter speed dial and mode selector‚ crucial for controlling exposure. The shutter speed dial allows manual selection of shutter speeds ranging from 1 second to 1/1000th of a second‚ plus Bulb (B) setting for long exposures. The mode selector offers Program (P)‚ Aperture Priority (A)‚ and Manual (M) modes‚ providing various levels of automation and control. Selecting ‘A’ allows you to set the aperture while the camera selects the correct shutter speed. Familiarizing yourself with these controls is the first step in mastering creative photography with the FG.
Front of Camera⁚ Lens Release and Depth-of-Field Preview
The front of the Nikon FG features essential controls for lens operation and creative control. The lens release button allows for quick and easy lens changes‚ enabling the use of a wide variety of Nikkor lenses. The depth-of-field preview lever‚ when activated‚ stops down the lens to the selected aperture. This allows you to visually assess the zone of sharpness in your image before taking the picture. This is particularly useful in Aperture Priority or Manual modes. Understanding these controls enhances your ability to fine-tune focus and manage creative effects.
Viewfinder Information⁚ Metering and Focus Aids
The Nikon FG viewfinder provides essential information for achieving proper exposure and focus. The metering system displays readings to guide your aperture and shutter speed settings in Manual and Aperture Priority modes. Focus aids‚ such as the split-image rangefinder and microprism collar‚ assist in achieving sharp focus. By carefully observing the information presented in the viewfinder‚ you can confidently adjust the camera’s settings to capture well-exposed and sharply focused images. Become familiar with these indicators to master the art of photography with your Nikon FG.
Operating Modes Explained
The Nikon FG offers Program‚ Aperture Priority‚ and Manual modes. Program mode is fully automatic. Aperture Priority lets you control depth of field. Manual mode grants complete control over shutter speed and aperture‚ fostering creative expression.
Program Mode (P)⁚ Fully Automatic Exposure
Program mode (P) on the Nikon FG provides fully automatic exposure control‚ making it ideal for beginners or situations where quick shooting is necessary. In this mode‚ the camera automatically selects both the shutter speed and aperture based on the available light‚ ensuring proper exposure. The photographer simply focuses and presses the shutter button.
This mode simplifies the shooting process‚ allowing users to concentrate on composition and capturing the moment without worrying about manual settings. It’s a great option for general photography and fast-paced environments where adjusting settings isn’t practical. Program mode delivers well-exposed images with minimal effort.
Aperture Priority Mode (A)⁚ Setting Aperture for Depth of Field
Aperture Priority mode (A) on the Nikon FG allows photographers to control the depth of field in their images. In this mode‚ the user sets the desired aperture‚ which determines the amount of light entering the lens and the area in focus. The camera automatically selects the appropriate shutter speed to achieve proper exposure.
A wider aperture (smaller f-number) creates a shallow depth of field‚ blurring the background and isolating the subject. Conversely‚ a smaller aperture (larger f-number) increases the depth of field‚ keeping both the foreground and background in focus. This mode gives creative control.
Manual Mode (M)⁚ Full Control Over Shutter Speed and Aperture
Manual mode (M) on the Nikon FG provides complete control over both the shutter speed and aperture settings. In this mode‚ the camera’s light meter assists in determining the correct exposure‚ but the photographer makes all the decisions.
This mode is ideal for situations where precise control is needed‚ such as long exposures‚ creative effects‚ or challenging lighting conditions. Photographers can adjust both shutter speed and aperture to achieve the desired exposure and depth of field. Mastering manual mode unlocks the full potential‚ offering creative freedom beyond automatic settings. It allows deliberate choices regarding motion blur and focus.
Basic Operation
Understanding the basic operation of the Nikon FG is essential for capturing well-exposed photographs. This section covers film loading‚ ISO setting‚ and using the light meter. These are fundamental steps for all photographers.
Loading and Unloading Film
To load film into the Nikon FG‚ first‚ open the camera back by gently lifting the rewind knob. Insert the film cartridge into the film chamber and pull the film leader across the film plane to the take-up spool. Ensure the film engages with the take-up spool’s teeth. Advance the film using the film advance lever‚ typically two to three times. Close the camera back until it clicks shut. Continue advancing the film until the frame counter shows ‘1’. The camera is now ready to take the first picture.
To unload‚ rewind the film into its cartridge using the rewind knob until you feel the resistance release. Open the camera back and remove the film cartridge.
Setting the ISO
Setting the ISO on your Nikon FG is crucial for proper exposure. The ISO dial‚ typically located around the shutter speed dial‚ allows you to match the camera’s sensitivity to the film’s ISO rating. Lift and rotate the dial to align the desired ISO number with the indicator mark. Common ISO values include 100‚ 200‚ 400‚ and 1600.
For brighter conditions‚ use a lower ISO like 100 or 200. In low-light situations‚ opt for a higher ISO such as 400 or 1600. Ensure the ISO setting corresponds to the film loaded in the camera. Incorrect ISO settings can result in over or underexposed images.
Using the Light Meter
The Nikon FG’s built-in light meter assists in achieving correct exposure. To activate the meter‚ gently press the shutter button halfway down. Look through the viewfinder‚ and you’ll see metering information displayed. The meter indicates whether your shot will be overexposed‚ underexposed‚ or properly exposed based on the current aperture and shutter speed settings.
Adjust the aperture or shutter speed until the meter indicates a balanced exposure. In aperture priority mode‚ you set the aperture‚ and the camera selects the appropriate shutter speed. In manual mode‚ you control both settings. Pay attention to the meter to ensure well-exposed photos.

Flash Photography
The Nikon FG supports external flash units for low-light situations or creative lighting effects. Understanding flash synchronization and compatible Speedlights is crucial for optimal flash photography with your FG. Explore the possibilities!
Using Nikon Speedlights with the FG
The Nikon FG is compatible with a range of Nikon Speedlights‚ enhancing its versatility in various lighting conditions. When using Nikon Speedlights‚ ensure proper mounting and connection to the FG’s hot shoe. Refer to both the FG’s manual and the Speedlight’s manual for specific compatibility and operational details. Certain Speedlights offer TTL (Through-The-Lens) metering‚ providing automatic flash exposure control. Consult the Speedlight’s documentation to determine if TTL functionality is supported with the FG. Adjust flash settings on both the camera and the Speedlight to achieve desired results. Experiment to understand how different settings impact the final image.
Flash Synchronization
Flash synchronization is crucial for capturing properly exposed images with flash. The Nikon FG offers a flash sync speed of 1/90th of a second. This means the shutter must be fully open at this speed for the flash to illuminate the entire frame correctly. Setting a faster shutter speed will result in only a portion of the image being exposed by the flash‚ leading to a dark band. When using flash‚ set the shutter speed to 1/90th of a second or slower. In aperture priority (A) or manual (M) mode‚ manually select the appropriate shutter speed. In program (P) mode‚ the camera will automatically select a compatible shutter speed.

Troubleshooting
Encountering issues with your Nikon FG? This section provides solutions to common problems. Learn how to diagnose and resolve issues. It covers everything from film loading problems to light meter inaccuracies and basic camera malfunctions.
Common Issues and Solutions
One common issue with the Nikon FG is related to battery power. Ensure fresh LR44 batteries are installed correctly‚ as low power can affect meter readings and shutter operation. If the camera seems unresponsive‚ cleaning the battery contacts might help. Another frequent problem involves film loading. Make sure the film leader is properly engaged with the take-up spool. Avoid direct sunlight when loading to prevent fogging. Light leaks can also occur due to deteriorated seals. Replace the light seals to resolve this. Sticky shutter or mirror mechanisms can sometimes arise‚ requiring professional servicing. Lastly‚ if the light meter displays erratic readings‚ confirm the ISO setting is accurate. These tips should address many common Nikon FG issues.